Mastering the Audacity Interface: Are you struggling to make the most of Audacity, the powerful, free audio editing software? You’re not alone. Many find its interface daunting, but it’s packed with features waiting to be unlocked.
Imagine effortlessly navigating through Audacity, using features like a pro to create, edit, and produce high-quality audio. This guide is designed to transform your experience with Audacity, making what seemed complex incredibly simple.
We’ll delve into Audacity Interface, top features, and workflow tricks. You’ll learn how to customize the interface to your needs and use shortcuts for efficient editing. Whether you’re a podcast producer, a musician, or just keen on mastering audio editing, this guide will take your skills to the next level.
So, let’s dive in and start your journey to mastering the Audacity interface. By the end of this guide, you’ll be editing audio with confidence and precision. Read on to unlock the full potential of Audacity.
On this page, you’ll learn about the following:
Audacity Top Features & Interface
The Audacity interface is designed with the user in mind, providing a sleek and intuitive experience. Whether you’re a beginner or a seasoned professional, Audacity offers a clean and organized layout that allows you to focus on your audio editing tasks.
Here’s a closer look at the key features of the Audacity interface:
Toolbars and Controls
The way the menus and toolbars are placed is one of the first things you’ll notice about the Audacity layout. These choices at the top of the window give you different ways to manage your audio projects. On the other hand, the toolbars are right below the menus, making it easy to get to the features and tools you use often. You can look through these tools and toolbars:
Menus
- File Menu: The File Menu is where you start. You can make a new project, open a current file, save, export, or import audio from here. You use it to keep track of your work and files.
- Edit Menu: The Edit Menu has important writing tools like delete, undo, redo, cut, copy, and paste. It also has more powerful editing tools like duplicate, split delete, and silence audio.
- View Menu: The View Menu lets you change how your songs and waveforms are shown. With this app, you can zoom in and out and turn different toolbars on and off.
- Track Menu: This menu lets you add new tracks, mix them, and render the music. It also lets you control label tracks, which is important for putting audio parts in order.
- Generate Menu: This menu is where you can start from scratch when making music. It can make tones, noise, or silence based on your project’s needs.
- Effect Menu: This is one of the most powerful menus because it has a lot of different effects that you can use to improve your sound. These effects range from simple boosting and leveling to more complicated ones like echo, reverb, and compression.
- Analyze Menu: This menu is useful for more advanced users because it has tools for analyzing audio qualities like frequency and pitch.
The Toolbars
Let’s now explore the toolbars in Audacity.
- Tools Toolbar: Home to selection, envelope, draw, zoom, and time shift tools. It’s integral for fine-tuning your audio editing.
- Recording Toolbar: This toolbar makes it easy to get to recording settings, such as the device selection, input level monitoring, and recording meter.
- Playback Toolbar: The “Playback Toolbar” has buttons for playing, slowing, stopping, and skipping through your music.
- Mixer Toolbar: This toolbar lets you change the volume of both playing and recording, which is important for making the sound sound good.
- Edit Toolbar: This toolbar makes editing tools like cut, copy, paste, trim, and silence easy.
To use these tools and toolbars effectively in Audacity, you must know how they work. Even though they are meant to be easy to use, getting to know them will greatly improve your audio editing process.
Track Windows
In Audacity, the interface sections called “Track Windows” are where each audio track is shown and controlled. You must use these track windows to edit and easily handle projects. To give you a quick start on what you need to know about Audacity’s Track Windows:
- Track Controls: The track controls are on the left side of each track area. Some of these are the stop and solo buttons, the volume and pan sliders, and the track dropdown menu. The track goes silent when you press the stop button and plays by itself when you press the solo button. The volume and pan buttons place and balance the sound in the stereo field.
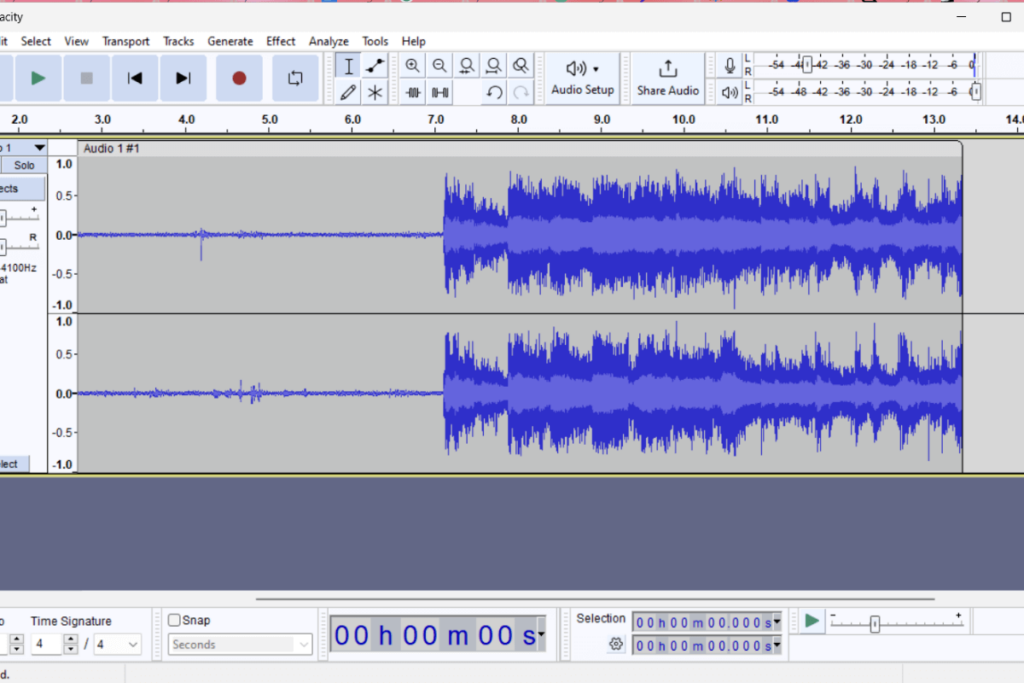
- View of the Waveform and Spectrogram: In Audacity, you can see tracks as either waveforms, which show how the sound’s volume changes over time, or spectrograms, which show information about the frequency. This wide range of viewing choices can be very helpful for editing audio in many ways, such as getting rid of noise or changing the frequency.
- Label Tracks: You can add label tracks to Audacity, which are extra tracks for adding notes and markers. These are very helpful for keeping your project organized, marking important parts of the audio, or lining up different songs in a big project.
- Changing Tracks: You can easily change tracks inside their windows. You can change the size of the track boxes to get a better view, drag to change the order of the tracks, and even split or join tracks depending on your project needs.
- Track Sample Rate and Format: Each track’s sample rate and format are shown in its window. Because of quality and compatibility reasons, it’s important to know about these choices, especially when working with multiple tracks recorded in different ways.
Understanding how to use Audacity’s Track Windows effectively will greatly improve your experience editing music. These screens are more than just places to put your audio files; they are also powerful tools that give you control and freedom to shape and mold your audio projects precisely.
The Transport Controls
When changing audio in Audacity, Transport Controls are very important. They let you play, record, pause, and move between audio tracks. These settings are easy to find in the upper part of the interface and are necessary for changing audio in real-time. Here is a list of each function:
- Play (Green Triangle Button): This is the set’s most-used button. When you click it, the audio starts playing from where the cursor is or the beginning of your chosen place. It’s important for listening to your songs and going over your edits.
- Stop (Black Square Button): Pressing this button immediately stops the movie or music. Using this first is important because most changing tools are turned off when the file is being played back or recorded.
- Pause (Black Two Vertical Lines Button): This button stops playback or recording quickly without moving the playback cursor. This helps when you need a short break but want to pick up right where you left off.
- Record (Red Circle Button): This button records sound from your chosen source when you click it. It’s necessary to record new sounds, voiceovers, or musical acts.
- Skip to the beginning (arrow pointing left): This button takes you back to the start of your project. It helps to rewind or play back the track from the beginning.
- Skip to End (Right Arrow Pointing): On the other hand, this button takes you to the end of your job. You can get to the end of a long music track quickly.
- Loop Play (Two Arrows Forming a Circle): This function repeatedly plays a certain part when turned on. This is especially helpful for editing or fine-tuning certain parts of music.
If you know how to use the Transport Controls correctly, they can improve your Audacity process.
Editing Tools
Audio editing tools are at the heart of Audacity. They let you change and improve audio tracks. With these tools, you can make exact changes, make your audio fit your needs, and add creative touches to your projects. To edit audio well, you need to understand and learn these tools. Here is a more in-depth look at the main editing tools that Audacity has to offer:
- Selection Tool: This is the most-used tool, letting you change only certain parts of your audio track. You can pick apart to cut, copy, remove, or add effects to.
- Envelope Tool: This lets you change a track’s volume over time. It’s necessary to make breaks, lower background noise, or highlight certain parts of an audio track without changing the whole thing.
- Draw Tool: This tool is great for precisely fixing individual sample points and changing waveforms. This is especially helpful for removing clicks, pops, and other things you don’t want in your recording.
- Zoom Tool: The Zoom Tool lets you change how big or small the waveform looks. This is very important for editing in great detail because it lets you work on small audio parts.
- The Time Shift Tool: This lets you move tracks or parts of tracks forward or backward in time. To sync songs, change timing, and rearrange parts of a project.
- Multi-Tool: The Multi-Tool is a flexible choice because it blends the functions of several tools into one. Different editing tools are available based on where you click on the track, making the editing process smoother.
Each tool is important for editing, and anyone who wants to become an audio editor needs to know when and how to use each one. With Audacity’s editing tools, you can change your audio in almost infinite ways. For example, the Envelope Tool lets you make big changes, while the Draw Tool lets you make small tweaks.
The Effects
The Effect Tab in Audacity has a lot of powerful tools for changing and improving audio. It has a lot of different effects that can change the sound you’re listening to, from easy changes like boosting the volume to more complex ones like removing noise and balancing the volume.
When you click on it, all the effects you can use are shown in a drop-down box. These effects are organized into groups that make them easier to find, like “Time Effects,” “Noise Reduction,” and “Equalization.” Here are some effects that are used a lot:
- Amplify: This means turning up or down your sound’s volume.
- Equalization: Changing the mix of frequencies to improve the sound quality.
- Compression: This is a useful tool for lowering the dynamic range of your music, which means it can make loud sounds less loud and quiet sounds more loud.
- Reverb: Adds echoes to make the sound bigger and more real.
- Noise Reduction: This is necessary for removing hiss and background noise in records.
Adding Effects
To add an effect, pick out the part of the track you want to change and then choose the effect you want from the Effect Tab. When you click on most effects, a dialogue box will appear where you can change the settings and factors to fit your sound. You can also use the fade in/out. If you don’t know how to do it right, you can check out this guide on using the fade-in fadeout effect.
Previewing Effects
Audacity has a preview tool that lets you hear a short piece of the audio with the effect added. This is crucial for making changes before adding the effect to the whole track.
Real-Time Processing
Some effects can be processed in real-time, so you can immediately see the changes. This function is especially helpful for fine-tuning settings to get the desired result.
Adjusting and Adding Effects
Audacity also works with third-party plug-ins, which let you add more effects to the list. Audio editors who want to try more advanced or specialized effects will love this tool.
The Effect Tab in Audacity lets you edit and improve music in many ways. The effects in Audacity give you the tools you need to get the sound results you want, whether you want to clean up a recording, add artistic touches, or change the overall sound quality.
Why Audacity Stands Out
When it comes to audio editing software, a clean and intuitive design is essential. Audacity excels in this aspect, providing users with a user-friendly interface that simplifies editing. Here’s why the design of Audacity stands out:
1. Streamlined Menus and Toolbars: Audacity organizes its menus and toolbars logically and straightforwardly, making finding the essential functions and tools easy. The placement of these elements is intuitive, allowing users to navigate through the software effortlessly.</p>
2. Individual Track Windows: Audacity divides the main workspace into individual track windows, which is incredibly useful when working on multiple tracks simultaneously. This feature enhances efficiency and productivity, allowing for better organization and management of audio projects.
3. Waveform Display: One of the standout features of Audacity’s interface is its waveform display. This visual representation of the audio allows users to see the detailed structure of the sound, making it easier to identify specific sections for editing. This precision is crucial when dealing with intricate audio edits.
4. Selection and Editing Tools: Audacity offers a range of selection and editing tools that are easily accessible from the interface. From basic functions like cut, copy, and paste to advanced techniques like noise reduction and time stretching, Audacity provides a comprehensive set of tools to meet various editing needs.
5. Navigation and Zooming Options: Efficient navigation is crucial in audio editing software, and Audacity delivers. With its navigation and zooming options, users can easily move across the audio tracks, zoom in for precise edits, and zoom out for a better overview. These features contribute to a smooth and seamless editing experience.
Overall, Audacity’s clean and intuitive design makes it a preferred choice for both novices and professionals. Its streamlined menus, individual track windows, waveform display, selection and editing tools, and navigation options ensure a user-friendly and efficient audio editing experience. With Audacity, editing audio becomes a seamless and enjoyable process.
Customization Options
One of the great aspects of Audacity is its ability to be customized according to individual preferences and workflow. The software offers a range of customization options that allow users to tailor the interface to their specific needs. Here are some of the key customization features in Audacity:
Themes
Audacity allows you to change the interface’s appearance by applying different themes. Whether you prefer a dark or light theme or even a high-contrast theme, Audacity has options to suit your preference. Changing the theme helps personalize the software, improves visibility, and reduces eye strain.
Keyboard Shortcuts
To speed up your workflow, Audacity provides the option to customize keyboard shortcuts. You can easily navigate and control the software by assigning your preferred shortcuts to various commands and functions. This feature is especially handy for experienced users who are accustomed to certain key combinations and want to maximize efficiency.
Toolbars and Menus
Another aspect of customization in Audacity lies in the arrangement of toolbars and menus. You can display or hide specific toolbars and menus to create a clutter-free workspace. This allows for a more streamlined workflow, with essential tools and functions easily accessible at your fingertips.
Layout
Audacity also offers flexibility in organizing the layout of the workspace. You can configure the position and size of different windows, such as the track windows, mixer board, and effects rack, according to your preference. You can optimize efficiency and productivity by arranging the windows to suit your workflow.
Plug-ins and Extensions
Audacity supports various plug-ins and extensions that provide additional functionality and features. These can be customized and integrated into the software to enhance your editing capabilities. Whether you need advanced effects, noise reduction tools, or additional audio analysis features, Audacity’s plug-ins and extensions open up a world of possibilities.
Audacity’s customization options empower users to personalize the interface, optimize workflow, and improve efficiency. By tailoring the software to your preferred settings and requirements, you can create a workspace that works best for you. Whether you’re a beginner or an experienced editor, Audacity’s customization features are designed to enhance your overall audio editing experience.
Workflow Tricks in Audacity
There are a lot of workflow tricks and shortcuts in Audacity that can make editing music many times faster and easier. Here are some important tips to think about:
- Keyboard Shortcuts: Learn how to use the keyboard shortcuts in Audacity. These can make the writing process go much faster. To copy, press “Ctrl + C.” To paste, press “Ctrl + V.” To undo, press “Ctrl + Z.” You can save a lot of time with many more.
- Linking Effects: If you use the same set of effects a lot, linking them together will save you time. This way, you can add more than one effect at once instead of doing it for each track separately.
- Using Labels to Keep Things in Order: Labels can help you keep your project in order. You can mark parts of your music with them, which makes it easier to move around in big projects. You can also use labels and the “Find” tool to get to certain parts of your audio quickly.
- Using the Envelope Tool: You need to use the Envelope Tool to change the volume of different parts of your track without changing the volume of the whole track. This is very helpful for making podcasts or chats sound more even.
- Batch Processing: Use Audacity’s batch processing feature to do jobs that need to be done repeatedly on multiple files. This feature saves much time because it lets you simultaneously use the same effect or set of effects on multiple files.
- Custom Toolbars: Make your toolbars fit the way you work by changing them. You can move, add, or remove buttons to ensure they are always close at hand based on which tools you use most often.
- Spectral Editing to Remove Noise: Using spectral view and editing to remove noise precisely. This is especially helpful for removing certain sounds you don’t want, like hums or buzzes, without changing the rest of your audio.
- How to Use Truncation and Silence: To quickly clean up your tracks, use the truncate silence tool to cut long silences in half. In the same way, the generate silence tool can help you add breaks or pauses.
- Save Template: Save a template with your normal tracks, effects, and settings if you work on projects you do repeatedly, like podcasts or radio shows. You’ll have a basic plan for each new job when you start it this way.
- Checking and Changing Recording Levels: While recording, you should always check your levels. This keeps your music from clipping and ensures it’s at the right level, saving time in post-production.
Adding these workflow tips to your practice will make you much more productive and efficient in Audacity, giving you more time to work on the creative parts of audio editing. You can also visit this guide on customizing the interface for more information.
FAQs
Yes, Audacity provides customization options such as themes, keyboard shortcuts, toolbars and menus, layout, and plug-ins and extensions. Users can personalize the interface to optimize workflow and improve efficiency.
Yes, Audacity is designed to cater to beginners and experienced audio editors. Its user-friendly interface and customizable features enhance productivity and streamline workflow for all levels of expertise.
The Audacity interface is strategically organized with menus and toolbars for easy access to essential functions and tools. The main workspace is divided into individual track windows, enabling simultaneous work on multiple tracks.
Audacity offers a range of features including waveform display for precise edits, selection and editing tools, navigation and zooming options, effects and filters, and real-time audio preview.
The basic features include the menu bar, toolbars, track windows, and transport controls. These elements are essential for recording, editing, and navigating within the software.
Conclusion
As we end this complete guide to learning how to use Audacity, remember our journey. We were initially confused by how complicated Audacity is, but we’ve now figured out how to use its many features to find its power and versatility.
You’ve looked at everything from the basic features to the more advanced editing tools. You’ve also learned about the dynamic Effect Tab and how the Transport Controls work. You are improving at using this powerful software for editing music with each step.
You can change your recording projects now that you know this. You can use Audacity to make exceptional work, whether making podcasts, songs, or anything involving sound. The ideas and tips in this article are not just steps to follow; they are the keys to your artistic potential.
This trip shouldn’t end here. Use these ideas to help you with your projects. Try out the different tools, make your area your own, and look into Audacity’s features. Remember that you will get better at something the more you do it. So, start changing your audio files with Audacity and see what it can do.
But this journey shouldn’t end here. To continue your exploration and mastery of Audacity, visit AudacityGuide. You’ll find additional resources and expert tips to enhance your audio editing skills here. Use these ideas to help you with your projects. Experiment with the different tools, personalize your workspace and delve into all Audacity’s features.